Tutorial: Add the EBRAINS Design System to Your App
In this tutorial you connect the hello-ebrains app from Build Your First Application to the EBRAINS Design System: its stylesheet, its Tailwind configuration and its components. By the end, your page uses EBRAINS type, colour, layout and components, with no CSS of your own.
Time to complete: 30 minutes
What you’ll learn: what the design system gives an app in the monorepo, how to wire it into a Vite app, and how to use your first components.
What You’ll Build
By the end of this tutorial, you’ll have:
- The design system’s stylesheet and Tailwind configuration in your app
- The components registered and ready to use from React
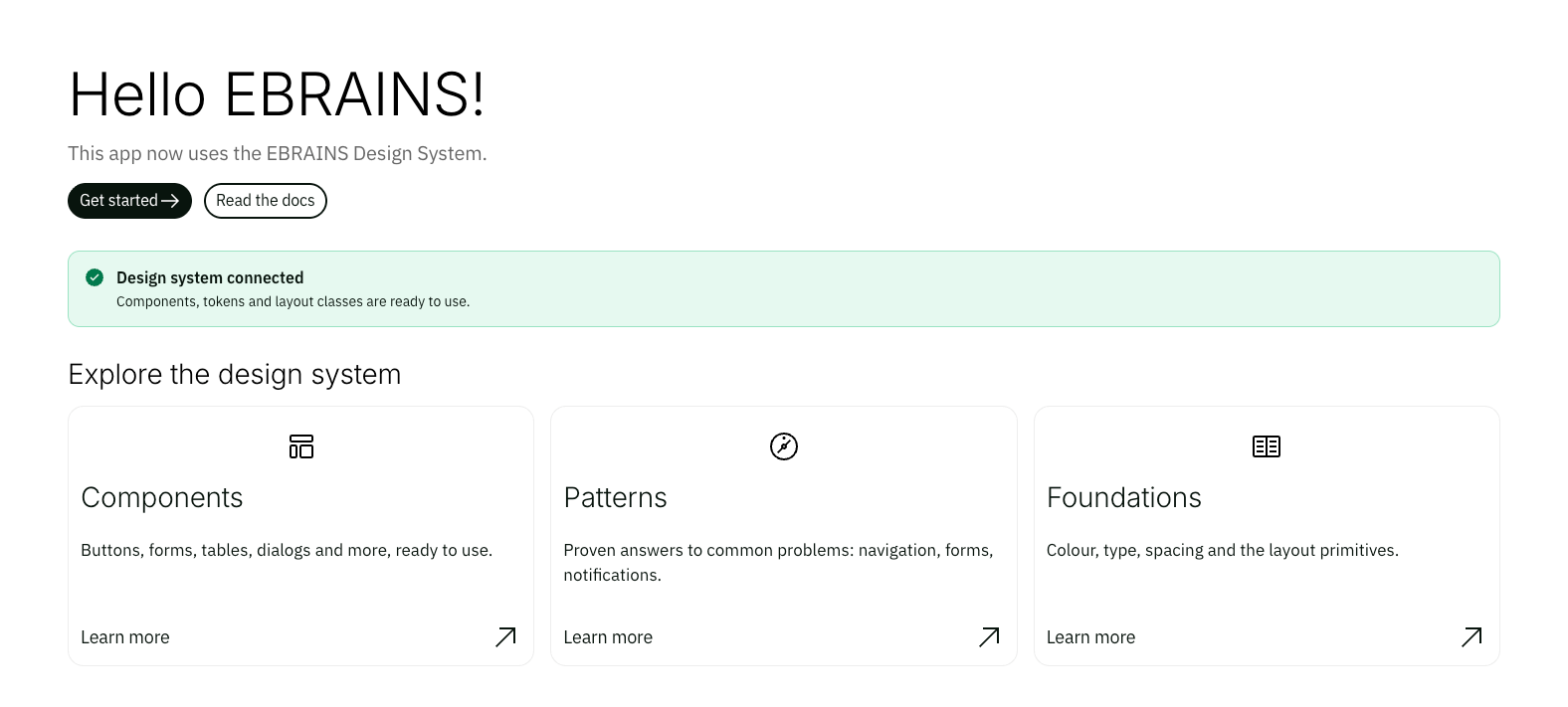
- A page with a heading, buttons, an alert and a row of cards, laid out with the design system’s classes
Prerequisites
Before starting, make sure you have:
- Completed Build Your First Application:
apps/sandbox/hello-ebrainsexists andnx serve hello-ebrainsworks - Basic React and TypeScript knowledge
What the design system gives you
Inside the monorepo you use the design system from source, so you always get the latest version and nothing needs installing:
| Package | What it is | How you use it |
|---|---|---|
@ebrains/components | The components, as web components (<eds-button>) | Registered once at start-up |
@ebrains/react | React wrappers (<EdsButton>) | Imported in your components |
@ebrains/assets | Tokens and the stylesheet | Imported in styles.css |
tailwind.factory.js | The shared Tailwind configuration | Called from your tailwind.config.js |
Vue and Angular apps use @ebrains/vue and @ebrains/angular the same way; the Build Inside the Monorepo guide covers both.
Step 1: Build the design system with your app
Your app uses the built components in dist/packages/components. Make Nx build them, and the stylesheet, before it serves or builds your app. Replace apps/sandbox/hello-ebrains/project.json:
What you just did: Nx infers serve, build, test and lint from vite.config.ts. You only added a dependency, so nx serve hello-ebrains now builds components and assets first. Nx caches them, so only the first run takes a minute.
Step 2: Add the styles and the Tailwind configuration
Import the design system’s stylesheet
Replace apps/sandbox/hello-ebrains/src/styles.css (the generated index.html already links it):
Create the Tailwind configuration
Create apps/sandbox/hello-ebrains/tailwind.config.js:
Point Vite at both
In apps/sandbox/hello-ebrains/vite.config.ts, add the imports and the resolve and css blocks:
What you just did:
main.cssbrings in the tokens (as CSS variables) and the base styles.- The Tailwind factory gives Tailwind the EBRAINS theme.
contentPathstells it which files to scan for class names, relative to the repository root. - The
resolvealias points the components’ loader at the built package.
Step 3: Register the components before rendering
The components are web components: the browser has to learn them before React renders. Replace apps/sandbox/hello-ebrains/src/main.tsx:
What you just did: rendered only once every <eds-*> element is defined. React can then pass arrays and objects (header links, form fields, table rows) to the components as properties. Rendering earlier turns them into the text "[object Object]".
Step 4: Use your first components
Replace apps/sandbox/hello-ebrains/src/app/app.tsx:
What you just did:
- Components from
@ebrains/react: props are camelCase (titleSize), events areon+ the event name (onClick), and booleans are plain JSX booleans (pill). - Layout classes, the design system’s layout primitives:
container max-w-default mx-autocentres the content with the EBRAINS gutters,flex flex-col gap-*stacks it, andgrid grid-cols-1 md:grid-cols-3lays out the cards. - Type and colour classes:
f-heading-02andf-body-01set the whole type style;text-lightis the secondary text colour. as constkeepsiconas the literal'template'rather thanstring, which is what the component’sicontype accepts. TypeScript catches a misspelled icon name.
Verify It Works
Expected result:
http://localhost:4200shows the page above: content centred with margins, three cards side by side on a wide window and stacked on a narrow one- Clicking Get started logs
clickedin the browser console, with no errors typecheckandtestsucceed
What You Learned
In this tutorial, you:
- Made Nx build the design system before your app
- Added the stylesheet, the Tailwind factory and the loader alias to a Vite app
- Registered the components before rendering, so data reaches them as properties
- Used components, layout classes and type classes together
Next Steps
- Continue with Build an EBRAINS Dashboard: turn this page into a complete Workflows dashboard with a header, hero, grid, table, tabs and a dialog.
- Browse the components, and try each one in Storybook.
- Look up classes in the Tailwind Class Reference.
Troubleshooting
Problem: Rollup failed to resolve import "@ebrains/components/loader".
Solution: the components aren’t built, or the alias is missing. Check the resolve.alias in vite.config.ts, and that dist/packages/components/loader exists (nx build components).
Problem: the components show, but there’s no spacing, centring or grid.
Solution: Tailwind isn’t scanning your files. Check contentPaths in tailwind.config.js, and the css.postcss block in vite.config.ts.
Problem: components render empty, or the console shows "[object Object]" is not valid JSON.
Solution: React rendered before the components registered. Render inside defineCustomElements().then(...) (step 3).
Problem: TypeScript: Property 'then' does not exist on type 'void'.
Solution: your components build predates the Promise<void> type (3.2.0 and earlier). Rebuild with nx build components.
Problem: TypeScript: Type 'string' is not assignable to type '"code" | "menu" | ...'.
Solution: add as const to the data. If it still fails, the icon doesn’t exist: the names are the keys of ICONS in packages/components/src/utils/icons.ts (your editor also autocompletes them).
Problem: Warning: Failed to load the ES module: packages/assets/frontend.config.js.
Solution: harmless; the configuration still loads.
Additional Resources
- How to Integrate the Design System: which setup for which app
- Customise Your App’s Tailwind Config
- Build Inside the Monorepo: the same setup for Vue and Angular